
Happy New Year’s, ya’ll!
It’s time for a fresh start!
Last New Year’s I wrote a blog post about cleaning out and reorganizing your kitchen pantry. It was such a hit (and I got tagged in some super inspiring before + after photos on social!) that I’ve decided to bring it back this year. But in this new edition, we’ll be deep diving into some potentially scary territory… your freezer.
Which brings me to our opening questions:
1) Is your freezer a place where food goes to die a slow and sad death?
2) Is your freezer filled with UFOs (unidentifiable food objects)?
3) Does your freezer give off a “fuck yeah” vibe or an “eww gross” vibe?
If it’s not a “fuck yeah” vibe across the board, let’s do a little reorganizing!
This is also the perfect activity for all my food prep queens! You may know that I run a virtual program, Postpartum Food Prep, which teaches all about nutrition for postpartum recovery and make-ahead freezer meal prep.
Your freezer can seriously be your BFF when it comes to food prep and preserving seasonal foods, but only if you use it right. Remember, you don’t need a ton of space to do freezer meal prep… you just need to use it well! So let’s get to it!

Step #1
Clean it out
If your freezer is currently a total death trap, I want you to get all Marie Kondo on that shit. Take everything out and lay all your items on your kitchen counter top. Then wipe out your freezer using a rag and a little cleaner if necessary. If it’s a serious hell hole, you can unplug your freezer to defrost it (warning, this would defrost your fridge too) for a deep cleaning. Otherwise just give it a good wipe down with some vinegar and you should be good to go.
Step #2
Pass judgement and toss
Identify all your food objects and get sorting. Anything that looks ancient and gross goes into compost or the trash if necessary. I hate food waste but part of our mission right now is to get your freezer functional so you can lessen food waste moving forward! Don’t keep around old nasty food that is low vibration. That just brings everything down.
Step #3
Categorize with food bins or designated areas
Once you have your foods sorted by category (example- meats, fruits, treats, etc) it’s time for proper placement. One popular method is to use open-top containers in your freezer to keep things organized. You can purchase clear plastic bins at a store like Target, The Container Store, or even Dollar Tree that will sit on your freezer shelves to keep your food organized into groups. I know, plastic sucks. One alternative is wire baskets, like the ones in my photos (you can even find stackable baskets). You could theoretically use a glass option that’s freezer safe, just take care as it will become heavy once it’s filled. (If anyone knows of any other great options for containers, please let us all know in a comment below!).
You may like to measure the width and depth of your freezer before purchasing bins so you make sure they’ll fit. A free option is to use a few cardboard boxes (like a shoe box) that fit nicely onto your freezer shelf (shoot, put that next Amazon delivery box to good use!). Cut off or fold in the top flaps so the top is open and food is easily accessible. I think a clear or wire container option is definitely the most helpful and I think it looks cleaner and nicer (we always want to keep the energy up around our food!), but use whatever you want.
If you don’t want to use any storage containers you can become a master stacker. You will still want to group your foods together inside your freezer so things stay organized.
Step #4
Label containers
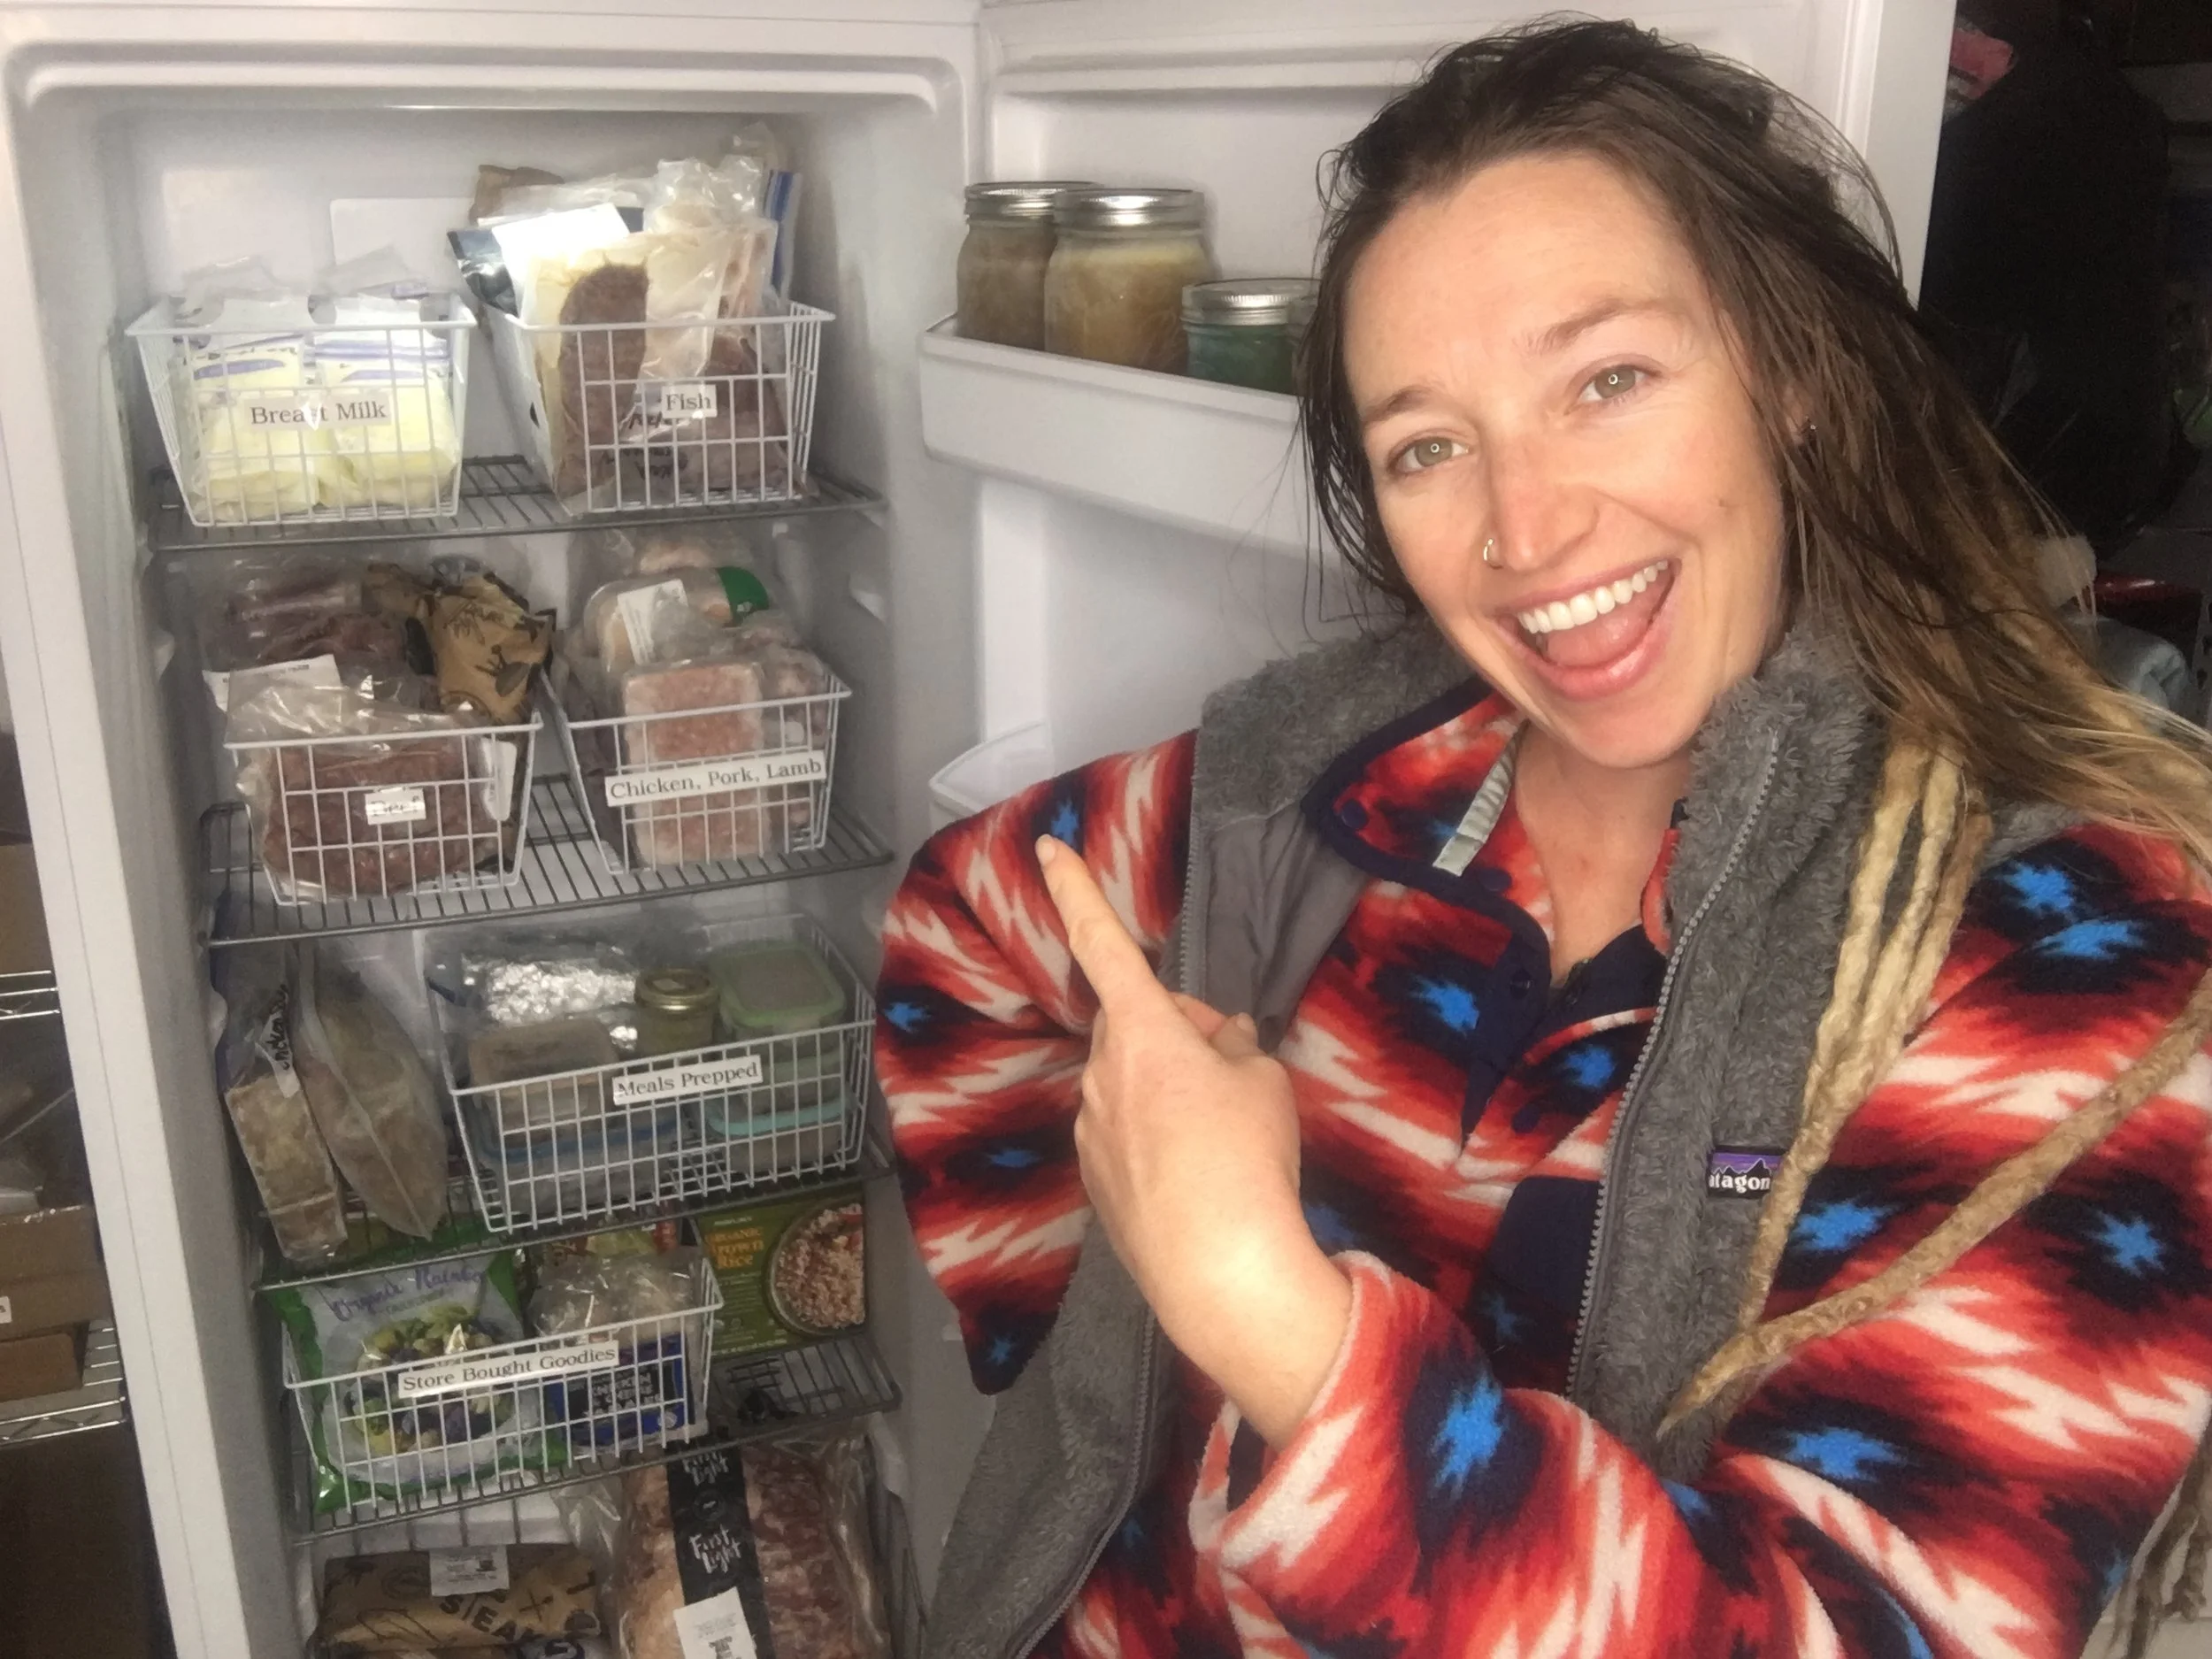
Label your containers by category. If you’re not using containers, tape labels to your freezer shelves to keep things grouped together. For some inspiration, here’s the categories I’m labeling in my own freezer!:
-meats (beef, fish, chicken/pork/lamb) (meats freeze well so I stock up when in season at farmers market or when grass fed options go on sale at the store. If you have a lot of meat you can designate a few bins and label them with the type of meat).
-broth (as I teach in my Postpartum Food Prep program, bone broth is a staple in cooking. And it’s so nutritious! So I go through cycles of making huge batches and freezing a ton. I typically freeze in mason jars or in silicone 1 cup molds and then I pop them out and store in a freezer bag).
-bones + scraps (well you gotta make the bone broth from something! I save all the bones from meat we eat at our house. If we have a roasted chicken, I save all remains. I also save veggie scraps (like broccoli stems, carrots just before they wilt, etc.) to go into broth too and that goes in this container as well since it’s all goin into broth eventually).
-smoothies (some people food prep “smoothie packs” so that making a morning smoothie literally takes a few moments. I tend to forgo this and just keep all my frozen fruit and frozen veggies for smoothies (like zucchini, cucumber, spinach) in the same bin).
-prepped meals (these are fully cooked food prep meals that are ready to be defrosted and heated up for fast and easy serving! This category is usually the bulk of my freezer. And the secret to consistent healthy eating at our house!).
-store bought goodies (as much as I love to cook from scratch, having quality store bought foods on hand can be very handy).
-for baby (we have some goodies that are specifically for my little one so keeping these all together makes things a bit easier during a melt down!).
-breast milk (every breastfeeding mama knows this priceless elixir of life deserves its own category! Lol as a breastfeeding mama myself I store in proper bags and make sure to label each bag with amount and date. Put the oldest bags at the front of the container to be used first).
Some other categories you might include are desserts, sauces (I love making big batches of marinara and pesto in the summertime), veggies, soups (we meal prep a lot of soups so if I had enough on hand I’d give em their own bin), or foods specifically for kiddos or any family member with a food allergy where it’s helpful to keep their food separate. Lastly a misc. catch all bin is never a bad idea, but if you find this section frequently overflowing, consider turning “random ingredient” foods into finished meals instead.
Tip for folks living with housemates where you each purchase food separately: make a bin in your freezer with your name on it! This will make it easier to find your food options when you’re hungry.
Step #5
Inventory list
Optional to take it to the next level— make a list of what’s inside your freezer and tape it to the outside! Write your list down by category and include relevant dates. This can make it helpful to see with a quick glance what you have available to eat and can also be helpful when making a grocery list!
Step #6
Plan ahead and rock this mother
Once you’ve cleaned out your freezer, grouped your foods together by category and ensured everything is properly labeled, you’re ready to start rocking! Now you can stock up during sales and preserve seasonal treats! Make good use of your new and improved freezer by thinking ahead when it comes to cooking meals. Don’t wait til you’re hangry.
One way I practice this is each night before “closing the kitchen” and getting ready for bed, I check to see if we have anything ready, planned, or at least available for dinner the next night. If not, I will pull out a meal prep container (like a stew, curry, or casserole, etc) or a protein from the freezer (we almost always have fresh veggies to accompany this) to defrost in the fridge over night so we are ready to rock the next day.
Tips for the future
Always label and date your food prep creations so they don’t become future UFOs.
Try using a sharpie and masking tape or chalk pens to write directly on your containers.
If you have a small freezer, you can save space by taking store bought freezer foods out of the box/outer shell. Just make sure it’s still airtight and label your foods as well as any heating instructions. You can also save space by freezing bagged foods flat (not in a crumply heap) and then filing them upright.
If your freezer gets out of hand in the future (hey, sometimes life happens!) return to this practice and put the necessary steps in place to get things functional again.
Have fun turning your freezer into your BFF!
PS- Are you pregnant or postpartum?
Check out my course, Postpartum Food Prep, to learn about nutrition for postpartum recovery and how to crush make-ahead freezer meal prep with 14 specifically crafted recipes for postpartum and breastfeeding. Let’s take the guess work out of choosing freezer safe containers, tracking freezer inventory, and making delicious meals that will help nourish you through the amazing newborn stage. We got this, mama!
